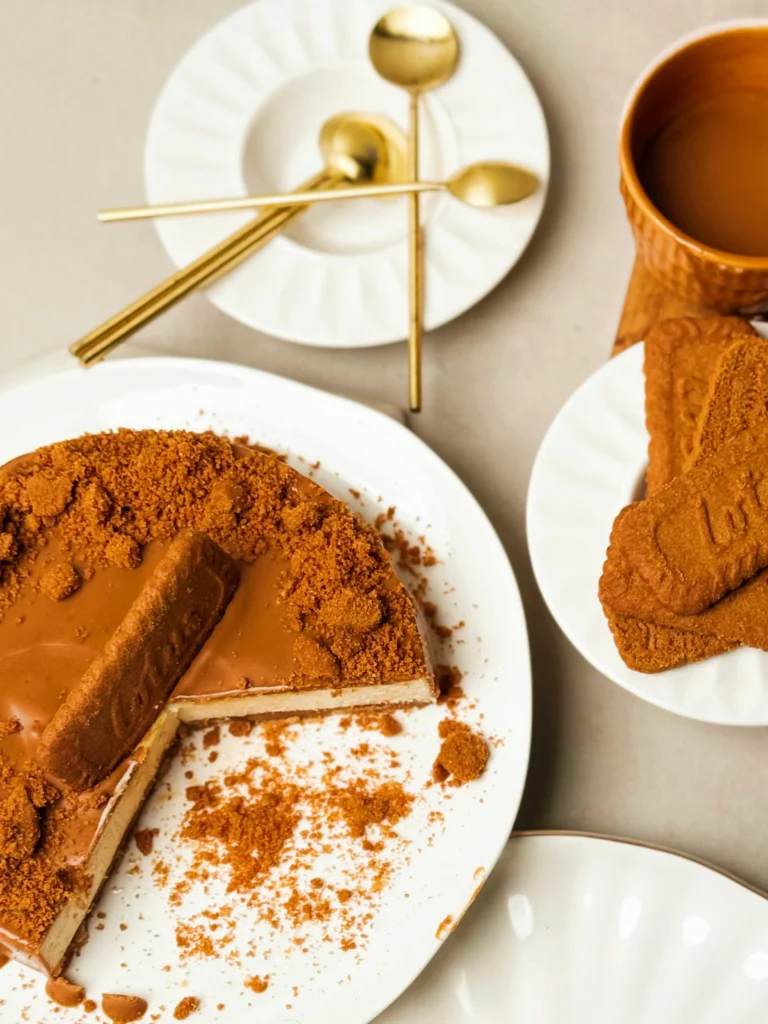
Have you ever wanted a delicious dessert from a bakery but needed a vegan version? That’s how I came up with this No Bake Vegan Biscoff Cheesecake recipe! I saw a beautiful Lotus Biscoff cheesecake and decided to make a vegan version at home instead of buying it. It turned out even better than I expected—creamy, rich, and full of that yummy spiced caramel Biscoff flavor.
This No Bake Vegan Biscoff Cheesecake is super easy to make. It only takes a few steps and doesn’t require any baking. If you want to impress yourself and anyone who gets to enjoy this dessert, let’s get started!
Why No Bake Vegan Cheesecake?
Let’s be real—baking can be little scary sometimes. With a no bake recipe you don’t have to worry about burning the crust or overcooking the filling. Plus it’s perfect for summer since you don’t have to turn on the oven. And this vegan cheesecake is dairy free and cruelty free so everyone can enjoy it!
The Power of Biscoff in Desserts
Biscoff is the magic ingredient that makes this cheesecake amazing. It’s sweet and spicy and hard to resist. Whether you use crushed cookies in the base or the creamy spread in the filling Biscoff adds a warm deliciousness that will have you going back for more!
Main Ingredients for No Bake Vegan Biscoff Cheesecake
Ingredients detail in recipe card below 👇
Biscoff Cookies: These tasty spiced cookies make a crunchy base for the cheesecake. Their sweet, cinnamon flavor adds a nice touch.
Vegan Block Butter: This replaces regular butter and helps hold the cookies together for a strong crust. It adds richness without using any animal products.
Cashews: When soaked and blended, cashews create a smooth and creamy filling that feels like traditional cheesecake.
Biscoff Spread: This adds a rich, sweet, and spiced flavor to the filling, making the cheesecake taste even better.
Vegan Cream Cheese: This gives the filling a creamy and tangy taste, making it rich and velvety.
Vegan Greek-Style Yogurt: This adds a bit of tang and creaminess to the filling, balancing the sweetness and improving the texture.
Maple Syrup: This natural sweetener adds a nice sweetness to the filling and enhances the overall flavor.
Coconut Oil: This helps the cheesecake filling set and gives it a smooth, firm texture when chilled.
Vanilla Extract: This adds a light flavor that makes the other ingredients taste even sweeter.
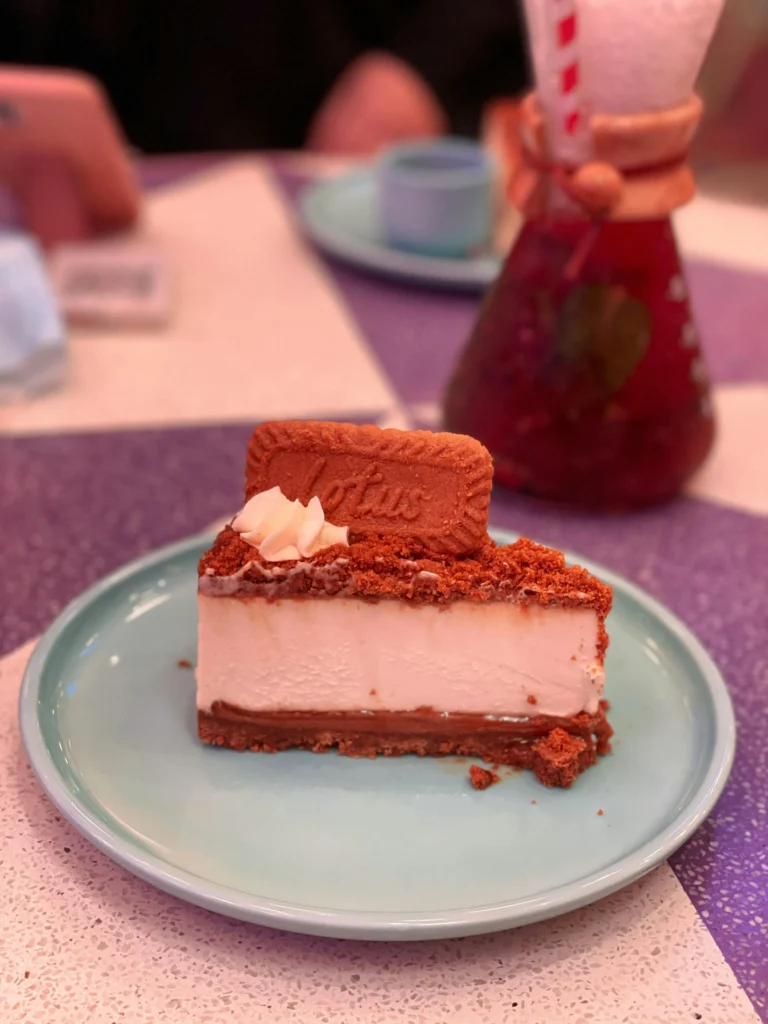
Toppings (Biscoff Spread & Cookies): Drizzling Biscoff spread on top adds richness, and crushed cookies give a nice crunchy contrast to the creamy filling.
Step-by-Step Instructions
1. Prepare the Crust
Start by crushing the Biscoff cookies into fine crumbs. You can do this in a food processor or by putting the cookies in a sealed bag and smashing them with a rolling pin.
Next, mix the cookie crumbs with melted vegan butter and a pinch of sea salt until it feels like wet sand.
Press this mixture firmly into the bottom of a springform pan, using the back of a spoon to smooth it out. Then, put it in the fridge for 30 minutes to set.
2. Prepare the Filling
Soak the cashews in hot water for at least 1 hour or overnight in cold water. After soaking, drain and rinse them.
Blend the soaked cashews in a high-speed blender until they are smooth.
Then, add the Biscoff spread, vegan cream cheese, yogurt, maple syrup, coconut oil, and vanilla extract to the blender. Blend everything together until it's creamy and well mixed.
Taste the filling and if you want it sweeter, add a bit more maple syrup.
3. Assemble the Cheesecake
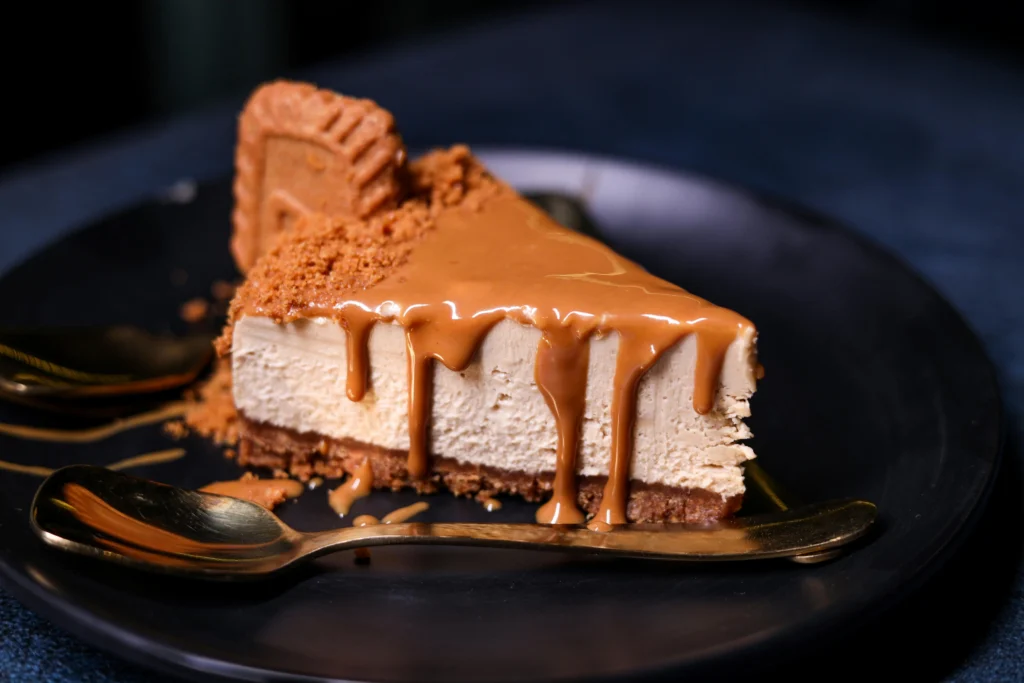
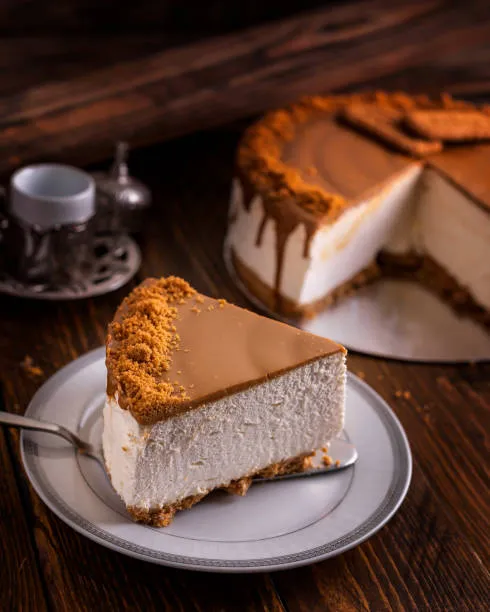
Pour the creamy filling over the chilled crust and use a spatula to smooth the top.
Cover the pan with plastic wrap and put it in the fridge for at least 6 hours, or ideally, overnight to set.
4. Garnish the Cheesecake
To finish, warm the Biscoff spread slightly in the microwave or on the stovetop so it's easy to drizzle.
Pour the warm spread over the set cheesecake in a nice pattern.
Finally, sprinkle some crushed or whole Biscoff cookies on top for an extra touch. Enjoy!
Secrets to a Perfect Vegan Cheesecake Base
Crush the cookies evenly to make fine crumbs, which helps create a sturdy base.
Chill the crust well in the fridge so it holds up nicely when you add the creamy filling.
Don’t skimp on the vegan butter; it helps bind the crumbs together and adds a rich flavor.
How to Achieve That Creamy Vegan Filling
The filling is what makes this cheesecake special. Using high-quality vegan cream cheese really makes a difference. Also, make sure your coconut cream is well-chilled before using it; this is key to getting a fluffy texture.
Decorating Ideas for a Showstopper Cheesecake
Even though this cheesecake looks great already, you can make it even more impressive! Try adding swirls of vegan chocolate, a sprinkle of crushed nuts, or a layer of fresh fruit for a splash of color.
Why This Recipe Will Wow Everyone
This No Bake Vegan Biscoff Cheesecake is a perfect mix of indulgence and simplicity. It's rich but not too heavy, sweet without being overly sugary, and has that delicious spiced caramel flavor from the Biscoff. Serve it at your next gathering, and it will definitely be the highlight!
Have you ever wanted a delicious dessert from a bakery but needed a vegan version? That’s how I came up with this recipe! I saw a beautiful Lotus Biscoff cheesecake and decided to make a vegan version at home instead of buying it. It turned out even better than I expected—creamy, rich, and full of that yummy spiced caramel Biscoff flavor.
Start by crushing the Biscoff cookies into fine crumbs. You can do this in a food processor or by putting the cookies in a sealed bag and smashing them with a rolling pin.
Next, mix the cookie crumbs with melted vegan butter and a pinch of sea salt until it feels like wet sand.
Press this mixture firmly into the bottom of a springform pan, using the back of a spoon to smooth it out. Then, put it in the fridge for 30 minutes to set.
2
Prepare the Filling
Soak the cashews in hot water for at least 1 hour or overnight in cold water. After soaking, drain and rinse them.
Blend the soaked cashews in a high-speed blender until they are smooth.
Then, add the Biscoff spread, vegan cream cheese, yogurt,maple syrup, coconut oil, and vanilla extract to the blender. Blend everything together until it’s creamy and well mixed.
Taste the filling and if you want it sweeter, add a bit more maple syrup.
3
Assemble the Cheesecake
Pour the creamy filling over the chilled crust and use a spatula to smooth the top.
Cover the pan with plastic wrap and put it in the fridge for at least 6 hours, or ideally, overnight to set.
4
Garnish the Cheesecake
To finish, warm the Biscoff spread slightly in the microwave or on the stovetop so it’s easy to drizzle.
Pour the warm spread over the set cheesecake in a nice pattern.
Finally, sprinkle some crushed or whole Biscoff cookies on top for an extra touch. Enjoy!
Nutrition Facts
Amount Per Serving
Calories512kcal
% Daily Value *
Total Fat38g59%
Saturated Fat12g60%
Trans Fat1g
Sodium291mg13%
Potassium121mg4%
Total Carbohydrate40g14%
Dietary Fiber2g8%
Sugars22g
Protein8g16%
Vitamin C 1 mg
Calcium 33 mg
Iron 1 mg
* Percent Daily Values are based on a 2,000 calorie diet. Your daily value may be higher or lower depending on your calorie needs.
Note
Soaking Cashews: Make sure to soak the cashews for at least 4-6 hours or overnight. This helps them blend smoothly into a creamy filling. If you're in a hurry, you can soak them in hot water for about an hour.
Coconut Oil: Use solid coconut oil for this recipe. If it's too warm and turns liquid, just pop it in the fridge for a few minutes to harden it up again.
Maple Syrup Substitute: If you want, you can swap maple syrup for agave nectar or another liquid sweetener. However, maple syrup really boosts the flavor and adds a nice earthy sweetness.
Vegan Cream Cheese: The type of vegan cream cheese you use can change the texture. Some are thicker, while others are more runny, so adjust how much you use to keep it creamy.
Topping Variations: You can change up the toppings by adding chopped Biscoff cookies, a sprinkle of cinnamon, or some crushed nuts for extra crunch.
Chilling Time: Let the cheesecake chill in the fridge for at least 4 hours or overnight. This helps it set properly and gives it the right texture.
Storage: Keep any leftover cheesecake in an airtight container in the fridge for up to 5 days. You can also freeze individual slices for up to a month—just let them thaw in the fridge before you eat them.